One Way to Become an Assistant Professor

Tags

, , , , , , , , , , , , , , , , , , ,

Big news!

I will be joining the faculty of Concordia University as an assistant professor in Biochemistry on August 1st.  The Findlay Lab will work on unlocking the biosynthetic repertoire of bacteria, particularly on production of “cryptic” antibiotics, and on direct evolution of bacteria.

In the spirit of the “Get a Job, Ken!” series here’s an account of my job search.  Hopefully it’ll be of some use to you.

Caveats

This write-up is a representation of my experience with the hiring process, and is not  perfectly (or at all) transferable to your situation.  Being a cis white male means living life on easy mode, and the effects are often subtle.  There are also portions of the process I can’t address for confidentiality reasons; not least the exact details of my research proposals. 🙂

First, be lucky.

I really can’t stress enough how important luck is to this process.  It’s ridiculous.  For example:

Do you have a solid body of published work attached to your name? (Did things work more often than not?  Where you in the right place at the right time?  Were you the golden child?)

Was the bulk of your postdoc work published quickly? (Did great work, but it’ll be published next January?  Too bad.)

Are there a lot of postings in your field this year? (Organic/Analytical/Biochem/etc.)  Has a recent drought of postings caused a backlog of more experienced applicants to build up?

Are a lot of other people from your lab currently looking for work?

Is your subspecialty in demand?  Does the department already have someone that does what you want to do?

Are your favoured universities even hiring this year?

Know Thyself.  Then Pick the Research Field.

In the third year of my PhD I started wondering how professors decided the themes of their research.  What is a good research project, and what separates successful researchers from those who struggle to get tenure? [1]

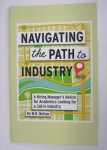
Part of this fascination made its way to the blog, and my review of “Marketing for Scientists” reflects my thoughts at the time.  What didn’t appear on the blog was a series of informational interviews with associate professors.  These culminated with an hour long conversation with a young “star” in Chemical Biology.  I chose to speak with associate professors because they had just finished the early part of their independent career, and the trials and tribulations were likely still fresh.

One common theme that emerged from these interviews was to critically examine my own skills, and determine where my training and ideas differed most from other researchers.  Work that stems from a rare mix of skills has a high barrier to entry, which encourages better funded labs to collaborate than compete [2].  My PhD work was entirely based around synthetic chemistry, but I had a BSc in molecular biology and biochemistry.  There aren’t very many chemists that work at the interface of microbiology and organic chemistry, and I thought I could come up with some interesting insights.

But good ideas mean little if you don’t have the expertise to back them up, and I had no direct research experience with bacteria.  Enter the postdoc.

I’m a committed Fox, more concerned with problems than the techniques needed to solve them.  So I moved to a lab that used both synthetic chemistry and molecular biology/biochemistry to probe the production of bacterial and fungal natural products.  This let me build expertise in “biology” [3], while still keeping my lab skills sharp.

When to Prepare?  Early.

About five weeks into my postdoc I bought a notebook and started preparing for independent research.  The goal at this point wasn’t to create fully formed research ideas, but to brainstorm up a few dozen major research projects that I might want to do.

As it turned out, the 2014-2015 hiring season started early, with the first major hiring spree (5 positions) closing on July 2nd.  This was at least six weeks earlier than expected, and left me scrambling in mid-June to put together an application.

After that first posting, more jobs started to appear.  Limiting my results to Canadian Universities, I found the majority of postings on either Indeed.com (search “Biology Professor”, “Chemistry Professor” or “Biochemistry Professor”) or NatureJobs.  At the busiest time (August 1 – Oct 1) I also periodically scoured the websites of departments I was interested in.  (Canadian) C&EN postings were limited, just a few ads appearing for only a short amount of time.

I made an excel file to track postings I was interested in, with columns representing each stage of the process. (Due dates, cover letters, proposals, and references).  Each application also got its own folder on my hard drive, to cut down on the chance that the cover letter for school X would accidentally be sent to school Y.

Preparing The Application Package

The net is full of job application advice, most of which has even been collected in one convenient place by Dr. Becca of Fumbling Towards Tenure.  This was an invaluable resource, every step of the way.

Beware the Triage

Every posting results in a hiring committee somewhere being buried under a small mountain of applications (200-300, on average).  The result is a heavy triage that produces a workable shortlist of 20-30 candidates.  You want to be in that shortlist.

While every committee member looks at different parts of the application, I spent significant time making the Cover Letter and Curriculum Vitae as clean and sharp as possible.

The CV is more than just a list of your publications stapled to your address.  Don’t forget to highlight your awards, conference presentations, leadership roles, and the names and projects of any undergraduate/graduate students you may have mentored. Make the CV easy to read (large headings, numbered publication list, etc.), so that someone skimming hundreds of applications will stop and notice the details [4].

In the same vein, your cover letter is probably your first (and perhaps last) chance to stand out.  It deserves the same care given to a research proposal, and should be personalized to each position.

Here is the basic layout I developed.  This isn’t from the application that was ultimately successful, but is similar.

My address

The Date

Their Address

To Whom It May Concern,

I am writing in response to the department’s recent posting for a tenure-track assistant professor in [named field]. I have a strong background in [applied, specific topic], and have direct experience in [research fields 1, 2 and 3].

I am currently a postdoctoral fellow at the [Postdoc University], working with Dr. [Postdoc supervisor] under an [Independent fellowship]. My research here has focused on [Project that takes up half my time], as well as [Project that takes up the other half]. Prior to this position I completed a PhD at [PhD University] under the supervision of Dr. [PhD supervisor], working on [Topic of my thesis]. I began my career at [Undergrad University] melding a Molecular Biology and Biochemistry major with a Chemistry minor. There I completed an honour’s research project on [Undergraduate research project] under Dr. [Honour’s supervisor], as well as performing research under a [Undergraduate grant] in the lab of Dr. [Grant supervisor], working on [Other undergraduate research project].

As a professor at [This University] I will focus on understanding [Topic of proposed research project 1], as well as [Topic of proposed research project 2]. [Research project 1] may be used to improve our understanding of the [Faculty research theme] studied by Dr. [Member of the department], while also potentially uncovering [Faculty research theme 2] of use to Dr. [Other member of the department].

Attached to this application please find a curriculum vitae and description of my teaching philosophy. Drs. [A, B, and C]l have agreed to support my application, and their contact information is also enclosed.

Please don’t hesitate to contact me if you require any further information.

I look forward to meeting all of you.

Sincerely,

Brandon Findlay

Hard copy applications were signed, but I didn’t worry about sending in an unsigned pdf.  What was important was the paragraph highlighting the work of faculty in the department, and the few words detailing how your research could help theirs.  Not only could this spark their interest (no telling who’s on the committee), it also shows that you’ve done a bit of homework, and could be a good fit for department you’re applying to join.

The Teaching Statement

Teaching is a huge part of any university.  In my teaching statements I detailed my teaching background, leaving the overall message (I love to teach and am good at it) as subtext.  Specifically, I outlined my undergraduate tutoring experiences, my successes as a TA, and the 1 on 1 mentoring I’ve done as a graduate student and postdoc (as well as this blog, obviously).  I closed by explicitly stating what courses I would be happy to teach (with course codes), and mentioned a potential 4th year/graduate course I could create.

In early applications this section ran on for far too long.  Limit yourself to one page.

The Research Plan

I liked preparing the research plans, and may have spent too much time researching and refining the ideas.  Aesthetically,  include as many images as possible (I aimed for 3-4 per proposal) and don’t be afraid to use white space.  Putting empty lines around your specific aims is costly, but can also draw attention to the impact of your work.

I shamelessly copied the research summary layout put forward by Kenneth Hanson.  The full proposals were subdivided into sections titled Introduction, Current Solutions, Headings 1-3 (subject specific), Challenges, Aims (bullet point) and Significance.

In other words, my standard layout, slightly tweaked.

Post Application

I aimed to complete and send in each application about 7-14 days before the deadline.  This was somewhat arbitrary, but fit well with the timeline for reference letters (past the first application each letter was requested at least two weeks in advance).

Once the application was submitted and acknowledged by the university there was a long quiet period.  About two thirds of the applications ended with someone from the department contacting me about 4-6 months after the deadline, to say that either I didn’t make the shortlist or they were going with another applicant.  Most of the rest gave no further response.

One department asked for a phone interview.

The Phone Interview

Based on structure and common questions of the phone/skype interview, most hiring committees don’t triage their shortlist like they do the initial mound of applications.  Rather, during the phone interview candidates will actively remove themselves from consideration, generally by demonstrating either a lack of preparation or a lack of interest in that specific department/university.  Those that remain can then be further debated and/or offered an in-person interview.

Phone interviews are short (~20 minutes), heavily scripted, and largely standardized.  As a result they’re relatively easy to prepare for.  The tenure track megalist contains a number of good posts on potential interview questions (here’s the link again), and there’s plenty of other sources around the net (pdf).  In my case I was asked all but one of the questions during practice interviews.

There is one question that you have to answer well, or the committee will likely not invite you for an interview.  It is in every list of potential questions, and was in fact the first question I was asked.

Why here?

“Why university X?” “Why this department?”  “What attracted you to this position?”  How you respond says a lot about whether or not you’re a good candidate for this department.

The 1st In-Person Interview

Congratulations on your interview!  Now there are only three things you need to demonstrate to seal the deal.

1. Can You Teach?

You must be able to deliver a competent undergraduate lecture, and to articulate the key points of your research to a broad audience.  The primary evaluation metric for this is the public lecture, a 45-60 minute talk about your prior research activities.

Public speaking skills aside, this talk is really a demonstration of your ability to synthesize a large body of work into a coherent story.  Both my PhD and postdoc work have involved antibiotic research in some form or another, so I was able to show an evolution of my interests from making antibiotics to understanding how they worked (this was a biochemistry posting, mind).

2. Can You Perform Independent Research?

From the public lecture I moved immediately to the private chalk talk, outlining what I planned to research as a new faculty member.  Some have had rough experiences here.

In general I subdivided my main research themes into  modules or projects, so that once through the introduction(s) I could detail the first 2/5/10 years of the lab’s research, or in the interest of time stop at an earlier stage.

For each research theme I introduced a relatively broad research problem and the current ways it was being addressed.  I then introduced my idea, couching it as an elaboration on already published material.  It took a fair bit of time to explain the theoretical underpinnings with previously published material, but 1)  committee members may have diverse backgrounds and know this research problem well, and 2) one of my ideas has a lot of unknown unknowns, and  I wanted to demonstrate that the idea was well grounded and that I had foreseen several stumbling blocks.  Come what may, I can make things work [5].

As with the written research proposals, it’s important to show that you’ve given just as much thought to the details as the  big picture.  I included potential funding sources for each project (down to the NSERC evaluation groups), and found a local biotech company I could potentially collaborate with [6].

3. Will You Make A Good Colleague?

Barring the odd high-profile move faculty that receive tenure are appointed for life.  That means that everyone from the Dean to the academic staff will have to work with the new hire for a long time.  Ensuring you will be a good colleague and fit in well with the department’s culture is a crucial part of the interview, and what consumes the bulk of the visit.

I found Hope Jahren’s take on this process to be quite helpful.  Her focus is really on the entire interview, but there’s a common thread.

Be nice.  Be happy.  Demonstrate that you’re the sort of person that (metaphorically) always puts on a fresh pot of coffee if they drain the pot, and won’t complain bitterly if someone else left the pot empty.

My experience with the 1 on 1 faculty meetings varied wildly, from having my work challenged to faculty excitedly presenting the details of their own research.  The best professor took me throughout the campus, introducing me to support staff and key contacts.

The Post-Interview Phase

It took me weeks after the interview to regain my centre.

Once a few weeks had gone by though I was well rested, but constantly checking my email.  Most schools interview three candidates, but few will contact choices 2 and 3 until someone has officially accepted the, which can be months.  The longer I went without news (on a day to day basis) the worse it felt.

Eventually though, the feeling faded.  And when the call did come it was a very pleasant surprise.

Negotiating and Postscript

I’ve already covered what to look out for when negotiating the startup package, so won’t address that further.  One thing I will add, if you have a spouse involve them in every part of this process [7].  They may not have a scientific background, but can still serve as a sounding board for ideas, a partner in mock interviews, and a source of advice.  This goes double for the negotiating process, as deciding to accept an offer means relocating to a new city/area/country for the next thirty plus years.

If you have any questions about any part of this process I’d love to hear them in the comments, and will do my best to provide answers.  If you’d prefer to contact me directly I can be reached at Brandon.Findlay@zoho.com

Good luck.


[1] Spoiler alert: Money goes a long way.

[2] Some examples of rare skills/focuses: high nitrogen compounds, high speed photography, metal-organic frameworks and crystallography, and (my focus) whole-cell biochemistry.  In some fields the barrier to entry is technical.  If your work requires a really expensive piece of equipment, only a few labs can do the work you do (that goes double if you have to build the equipment yourself).

[3] My work tends to draw from a lot of related fields.  Some of it (cloning, recombineering, protein expression) is classical molecular biology, while other parts are definitely either biochemistry (antibiotic characterization, model membrane studies), natural product chemistry (preparative metabolite isolation and ex vivo biosynthesis) or microbiology (growth inhibition).  To save time I’ll simply refer to the lot as “biology”.

[4] Here’s a slightly redacted version of the CV I sent out, on the off chance you may find it helpful.

[5] Of course, research success also comes from recognizing opportunity when it knocks.  A number of profs I’ve talked to have been almost perversely proud that they never did anything outlined in their initial research plans, or only found success after none of their original ideas worked.

[6] Company XXX is based two kilometres away, works with these types of therapeutics, and might be interested in licensing our work or providing funding sounds a LOT more impressive than “I will collaborate with pharma companies”.

[7] Thanks, Lisa! You’re awesome.

What’s in your library?

For a variety of reasons I’m taking stock of the various books I’ve purchased, appropriated from the group stores, or borrowed from the University’s library.    Most serve as long-term references, though the occasional book is for searching for research project inspiration.

Library

My list:

Arpe – Industrial Organic Chemistry

Barton and Ollis – Comprehensive Organic Chemistry Vol 2: Nitrogen Compounds (1979)

Carey and Sundberg – Advanced Organic Chemistry A and B

Chan and White – Fmoc Solid Phase Peptide Synthesis(Reviewed)

Collins and Ferrier – Monosaccharides: Their Chemistry and Their Roles in Natural Products

Dermer and Ham – Ethylenimine and other aziridines

Dodd – The ACS Style Guide

Feibelman – A PhD Is Not Enough! (Loaned out)

Fieser – Reagents for Organic Synthesis (vol 1)

Greene and Wuts – Protective Groups in Organic Chemistry

Hammesfahr and Stong – Creative grass blowing

Hudlicky – Oxidations in Organic Chemistry

Hudlicky and Reed – The Way of Synthesis

Kern and Di – Drug-like Properties: Concepts, Structure Design and Methods

Kuchner – Marketing for Scientists(Reviewed)

Larock – Comprehensive Organic Transformations

Leonard – Advanced Practical Organic Chemistry(Reviewed)

Levy and Fugedi – The Organic Chemistry of Sugars

Li – Modern Organic Synthesis in the Laboratory(Reviewed)

Lodish – Molecular Cell Biology

March – Advanced Organic Chemistry

Narain – Chemistry of Bioconjugates

Nelson – Navigating the Path to Industry(Reviewed)

Newman – Steric Effects in Organic Chemistry

Paquette – Encyclopedia of Reagents for Organic Synthesis (Vol 1) [1]

Pennington and Dunn – Peptide Synthesis Protocols(Reviewed)

Seyden-Penne – Reductions by the Alumino- and Borohydrides in Organic Synthesis

Slonczewski and Foster – Microbiology: An Evolving Science

Stoddart – Stereochemistry of Carbohydrates

Tufte – The Visual Display of Quantitative Information

Weinstein and Wagman – Antibiotics: Isolation, separation and purification


My work is a blend of chemistry and biology techniques, so it’s interesting to see that the reference books lean heavily towards chemistry.  This may be in part due to how standardized the molecular biology techniques are, and wealth of online protocols.


[1] This is online now.  I just like flipping through the hard copy.

The Ridiculously Thorough Guide to Making a MeOH/Water Bath

Tags

, , ,

MeOH Bath - Title card3

I got a request for some more details on the methanol/water bath from a few weeks back.  Enjoy!

Step 1: Pick a Dewar and Measure the Solvents

MeOH Bath - MeasureThe desired ratios are in the last post.  For this example I’ll be making a -20 °C bath, which requires a 30:70 ratio of MeOH to water.  This Dewar holds 150 mL, so I need 100 mL of liquid.

Large Dewars are more wasteful, but maintain their temperature far better.

Step 2: Crush Dry Ice

MeOH bath - HammerYou can use large chunks of dry ice, but the powder variety cools much faster.  I fill the pictured plastic ice buckets, then crush the dry ice with the bottom of the hammer (not the claw or face).

Step 3: Mix Solvents, Fill Dewar 1/3 Full

MeOH Bath - MixTransferring  the solvent from the graduated cylinder to an erlenmeyer flask ensures good mixing.  Pour half your solvent into the Dewar.

Step 4: Add Powderized Dry Ice Until Bath Begins to Freeze

MeOH Bath - ChillThis requires about a 5:1 liquid:dry ice ratio.  A large amount of bubbles and fog will evolve at the start, so add the dry ice slowly.  The ice should remain after 10 seconds of stirring with a spatula, but the solution shouldn’t freeze solid.

Step 5: Add Remaining Solvent

MeOH Bath - Match TempThis will melt the ice and evaporate any remaining dry ice, leaving you with a bath that is approximately your desired temperature (within 10 °C or so).

Step 6: Set and Maintain the Desired Temperature with 1-2 Pieces of Dry Ice

MeOH Bath - Maintaining TempChunks of dry ice about 1.5 cm x 1 cm work best.  After about five minutes you should see a fuzzy blob of ice form around the dry ice, indicating that you are at the desired temperature.

When the bath starts to warm this blob will float to the surface, and it’s time to add another piece of dry ice.  My record  with a 500 mL Dewar is one hour at -20 °C without further dry ice addition.

Note: Cooling the bath with liquid nitrogen works similarly to the above steps, but requires active stirring after coolant addition.  LN2 has a tendency to freeze the top layer of the bath,  and this must be broken up and stirred into the liquid fraction.


Experimental:
To a 50 mL mixture of methanol/water (30/70) in a 150 mL Dewar flask is added approximately 10 g of crushed dry ice.  The solution is allowed to bubble for thirty seconds, during which time a large volume of CO2 gas was released and approximately 40% of the solution froze.  When gas evolution slowed a second 50 mL solution of methanol/water was added.  A dry ice pellet (cylindrical, 1 cm x .5 cm x .5 cm) was then added and the temperature was verified via ethanol/dye thermometer.  The Dewar was then used to cool a 4 mL vial for an organic reaction, and the solution remained at -20 °C for approximately 15 min without intervention.

Methanol/Water Mixtures Make Great Cooling Baths

Tags

, , , , , ,

Learn better with pictures?  There’s a step by step writeup here.

Cooling your reaction to  0°C, -78°C or -196°C just requires ice, dry ice or liquid nitrogen.  But how do you get to a temperature in between?

Mixed Solvent Systems: Freezing Point Depression

Most undergraduate labs use mixtures of ice and salt, which can range from -10 °C to -40 °C, depending on the ratio and type of salt.  If you don’t have access to dry ice or liquid nitrogen this is probably the simplest option, though the two solids are irritating to mix and the setup can burn through surprisingly large amounts of salt [1].

You can also use mixtures of ethylene glycol and ethanol, which are useful from -10 °C to -70 °C (depending on the proportion of ethanol). As some of my recent research required odd temperatures, I started playing around with this system.  Ultimately I found that methanol/water mixtures are far more convenient and effective.

The effective cooling range of MeOH/H2O mixtures ranges from 0 °C to -128 °C (nadir at 86% methanol).  Here are a few measurements I’ve made:

Methanol Measurements

30% MeOH plateaus at -20 °C, 50% MeOH at -47 °C.

Each measurement is the warmest constant temperature, not the point of initial crystal formation.  Solvent mixtures don’t actually freeze, but instead form a slurry that on cooling slowly decreases in temperature.  This is because as water crystallizes out the proportion of methanol increases, leading to a new freezing point [2].

In my hands freezing ~10% of a 70:30 H2O:MeOH mixture wasn’t enough to shift the temperature of the bath more than a degree or so, but baths with higher methanol content were far less robust.  At 50% methanol I found a ~5 °C wide plateau 7 °C below initial ice formation, which meant that the amount of dry ice had to be carefully controlled.

One caveat: These baths are best when brought to the desired temperature and monitored every 15 minutes or so.  Adding a large excess of dry ice, as you would with an acetone/dry ice bath, will lead to a thick syrup that’s difficult to mix and far too cold. Ice still floats in the majority of methanol/water mixtures, but cubes will stay at the bottom of the Dewar if there is dry ice in their core.

The Other Options

If you need a constant, precise temperature a mixed solvent system just won’t work.  If a cryocooler is out of your price range, the next best thing is to freeze a pure liquid.  Water melts at 0 °C, but there are a lot of other chemicals in the lab, many of which are relatively inexpensive.  Freeze one of them with dry ice, make up the volume with fresh solvent, and you have a quick and dirty cooling bath [3].  Condensation will wet the bath, so if you plan on cutting costs make sure you pour the solvent into a new bottle when you’re done, not back into the communal stock.


[1] Over the summer one of our undergraduate students went though ~7 kg of NaCl, just making -20 °C cooling baths.

[2] The exception is an 88% methanol mixture, which can be frozen solid with liquid nitrogen. Working with an 86% solution I was able to create a thick syrup of consistent temperature by rapidly stirring through freeze/thaw cycles.

[3] The wikipedia page on cooling baths is surprisingly comprehensive.  Check there for specific freezing points.

Getting to Jobland

Tags

, , , ,

NavigatingI was recently gifted with a copy of “Navigating the Path to Industry: A Hiring Manager’s Advice for Academics Looking for a Job in Industry,” by M.R. Nelson.  It’s a slim volume, building on the author’s experience as a biotech hiring manager to provide a step-by-step outline to transitioning from a MS/PhD/Postdoc to your first industrial job and beyond.

The advice is both specific and practical, guiding you from the nebulous “discover what you want to do” to fielding inappropriate questions about family planning.  Little of the advice is earth-shattering, but it’s rare to see so much common sense in one place. The author should also be commended for finally offering a number of concrete benefits to signing up for LinkedIn, for example:

“Job-seekers considering different fields or making a career change [ie. from academia to industry] search their LinkedIn network to identify second level connections who might make good people to have informational interviews.  The standard procedure is to email your first level connection and ask to be introduced to the person with whom you want to have an informational interview.  Since you are being introduced by someone he or she knows, the new contact is more likely to agree to a meeting.”

Chemjobber provided his own impressions last month, which helped put the book on my radar.  Like him I highly recommend you get your own copy, and would go so far as to say it should be required reading for ~2nd year graduate students, regardless of their career aspirations.  That early in grad school the future is far from certain, and it takes several years to build a good network [1].


[1] Worst case, much of this book’s advice works equally well for finding collaborators.

Titrating Organometallic Reagents is Easier Than You Think

Tags

, , , , , ,

Recently I’ve been doing a mix of Grignards, Wittigs ,and alkyl lithium preps, necessitating quite a few titrations.  At the start I was dreading the (imagined) work involved, but in truth the process is quite painless.

Everything needed for a Grignard reagent titration.

Everything needed for the Grignard reagent titration.

Step 1. Pick a procedure.

There are a large number of different reagents that have been used at one time or another for organometallic titrations, each with their own pros and cons.  I prefer diphenylacetic acid for alkyl lithium (nBuLi, etc.) titrations and iodine/lithium chloride for Grignard reagent titrations.  If you want a one-size fits all approach, I2/LiCl will work for RMgX, RZnX, and primary/aromatic organolithium reagents.

Step 2. Dry and load your glassware.

As in most small scale reactions, these titrations are best run in a 4 mL sample vial.  Dry the vial (stir bar optional) in a 130 degC oven overnight before use, then cool in a desiccator.  The vials I use can contain the smell of isocyanides, so I consider them air-tight.

When the vial is dry, add 50 mg of either diphenylacetic acid or I2.  Iodine will react with the septa, and so should be titrated that day.  In vial under argon solid diphenylacetic acid is stable for prolonged periods, so I recommend preparing a few samples well in advance.

Step 3. Add the solvent.

For the diphenylacetic acid titration, freshly distill or dry under molecular sieves tetrahydrofuran.  Under argon flow, add one millilitre to the vial and stir/shake until the indicator is dissolved.

For the iodine titration, add 42.3 grams of LiCl to 200 mL dry THF (adjust the scale as needed).  Stir for one day, then add 40 grams of 3A molecular sieves.  Store sealed, away from light or moisture [1].  As above, add one millilitre of this mixture to the indicator.

Step 4. Titrate

While the organolithium bottle is under argon, insert a 1 mL syringe.  Draw up gas three times, each time emptying the plunger over a small beaker of either n-butanol or isopropanol 3].  Draw up 0.3-0.8 mL of organometallic solution, carefully determining the volume.  Once the reagent has been measured, draw up a further 0.2-0.3 mL of gas, then withdraw the needle such that this argon blanket sits between the tip of the needle and the solvent [4].

Maintaining this orientation, insert the needle into the vial and expel the argon blanket.  Carefully add the organometallic reagent one drop at a time, checking for either the appearance (diphenyl lithium) or absence (I2) of colour.  To ensure that the full quantity of reagent enters the THF solution, place the needle on the wall of vial, roughly 3 mm above the solvent.

When you are approaching the primary endpoint, slow the rate of addition.  When the colour just persists/vanishes, record the volume of reagent added.  Dispose of the remainder by slowly adding it to the beaker of butanol/isopropanol, then further quench the waste beaker via slow addition of ethanol or methanol.

Titrating with the iodine solution moves from dark purple to orange before arriving at a colourless endpoint.

The iodine solution goes from brown to red before its final cloudy, colourless endpoint.

Diphenylacetic acid ends at a light yellow colour.

Diphenylacetic acid ends at a light yellow colour.  A white precipitate may be visible.

Step 5. Calculate

The formula of interest:

Molaritystock = Massindicator/(MWindicator/Volumestock)

Mass of the indicator is in milligrams, volume of the stock is in millilitres.  With most syringes this value is accurate to two significant figures, though if necessary a Hamilton syringe can be used to give three sig. figs. If precise concentrations are required take the average of three titrations.

MW diphenylacetic acid: 212.24 g/mol

MW Iodine: 253.81 g/mol

Step 6. Cleanup

Both titrations can be quenched with methanol, then disposed in standard organic waste.  Be careful with the lithium chloride solution, as LiCl is a potent skin sensitizer.


[1] Like all ethers THF forms peroxides on standing.  Check for peroxides annually with a starch/iodide test strip, and dispose of any positive samples.

[2] For Grignards and nBuLi I use a disposable 1 mL BD insulin syringe, with 22 G needle.  For tBuLi or other highly flammable reagents I recommend a dedicated teflon/glass syringe, like these ones sold by chemglass.  Dry the teflon syringe in a vacuum desiccator before use, never heat.

[3] Always keep a bottle of sand nearby for small organometallic spills and a fire extinguisher within reach for larger fires.  Reorganize the fumehood so that flammable solvent bottles (especially diethyl ether) are far from the area in which you are working.

[4] This prevents the reagent from reacting with air or dripping from the tip.  Either situation can cause a fire under the wrong circumstances.

Preparing For Independent Research

“Nothing in the world can take the place of persistence. Talent will not; nothing is more common than unsuccessful men with talent. Genius will not; unrewarded genius is almost a proverb. Education will not; the world is full of educated derelicts. Persistence and determination alone are omnipotent. The slogan Press On! has solved and always will solve the problems of the human race.”
Calvin Coolidge
 

Every lab has a multitude of research notebooks, physical or electronic.  As a student, the lab book is the most obvious record of your trials and tribulations: the experiments that worked and the many failed attempts. Alongside your thesis, lab books are also the most obvious sign of your passage.  They’re history in solid form.

Let’s talk about the future.

The tail end of a PhD isn’t just for sagely offering advice to incoming students and slowly reducing lab hours to focus on “writing.”  It’s also the time to buy a new notebook.  A nice one, faux leather or perhaps moleskin.  This book isn’t for your PhD, or the post-doc, if you’re planning on going that way.  Rather, it’s a place to collect all the ideas, potential projects, and marketable inventions that inspire you.  This is a book for your independent career [1].

Reading Ahead

To steal from Stephen King, if you want to be a scientist, you must do two things above all others: read a lot and write a lot. There’s no way around these two things that I’m aware of, no shortcut.

Great ideas require inspiration, and seeing the work of others inspires.  Over the past eighteen months I’ve read more papers than the past five years combined, even on one occasion skimming through the entirety of the the 1965 volume of the Journal of the Chemical Society (resumed) [2].  Voracious reading lets you link disparate observations into new ideas, and with your own experiences sometimes you see an experiment and wonder, “what would happen if I tried these conditions on this substrate?”  Conferences and seminars can have the same effect, but the literature is far broader and always available.

Being inundated with information, it’s important to view each paper in the context of your research interests [3].  This will skew your view, which means you just might see something the original authors didn’t [4].

Work It Out

Alright, let’s say you were browsing the JACS ASAPs, and you’ve hit on a connection to some 1980’s Tet. Lett. paper.  Quick, write it in the notebook!  Good.  Now, let’s see if it’s worth pursuing.

First, search the literature.  High impact research tends to be pretty obvious, so there’s a good chance that someone else has hit on the same connection.  A quick search on Scifinder, Web of Science, and Google can determine if the idea was worked to its logical conclusion long before you were born.

If you read enough, as the months go on you’ll start to accumulate a fair number of ideas, to the point where it’s not feasible to investigate them all.  To triage I focus on three core questions:

1. Is the idea novel?

Does it stand out from prior work?  If someone has hit on something related to your idea then there’s less to disclose and subsequently less impact.

2. Will this change how people work?

Does this meet an unmet need?  There are a lot of ways to making amides, but not too many for nitriles.  Nitriles are pretty useful, so that represents an unmet need that you could fill.

3. How can you demonstrate the impact?

If your idea is important, prove it.  If you have a new reaction, this generally means making an challenging natural product or therapeutic with ease.  If it’s a med. chem. project, you could demonstrate impact by testing against a whole cell or model organism (collaboration will probably be required; network early).  Keep the demonstration simple; the goal is not to wag the dog.

Show Your Work

Once you have about a half-dozen ideas, it’s time to take the best and start filling in the details.  Ultimately the goal is to get hired/get funded/start a company, and the only way to do that is to convince people that what you want to do will work.  Hope Jahren has put together an extremely good write-up on how to turn an OK proposal into a great one, so in the interest of brevity I’ll point you her way.  If you’re looking for a quick proposal outline, I wrote one up some time, and Kenneth Hanson covered his style as part of a larger series on getting an academic job.

Writing budgets and triple-checking for typos isn’t necessarily fun, but to paraphrase Hope Jahren, think of what you’re asking for.  Hiring and paying a new professor until tenure review costs any given university the better part of a million dollars in start up funds, overhead and salary.  If you had a million dollars lying around, how likely are you to give it to me?

I’d need to be pretty convincing.

Find the Time

Looking over everything, I’m asking for a pretty big investment of your time.  Say 20 hours per bolt of inspiration (~3 bolts per viable idea), another 20 to develop the idea, and anywhere from 20 to 80 hours to write and hone the proposal.  That’s almost a month of dedicated time, sandwiched in between all of your other responsibilities.

Like thesis writing, the best policy is to find a 1-3 hour block of time in your week that generally isn’t productive, and dedicate that to this effort.  For me this tends to be ~8-10 in the evenings (prime blog writing time, unfortunately), Sunday mornings, and Friday afternoons.  Your times may vary, but the point is to dedicate some period to producing excellent research ideas.  With persistent effort you can do anything.


[1] Think of the notebook as a cliffs notes guide to your ideas, not a comprehensive guide.  You’ll also need to accumulate supporting references and eventually prepare formal proposals and talks, but there’s no need to carry those wherever you go.

[2] By the end I had fifty or so papers worth looking into a little closer, and one or two that gave me ideas of my own.  Other sighs of obsessiveness include the Dictionary of Natural Products, and Wikipedia’s List of Organic Reactions, all 700 or so entries.  Most of the reactions didn’t stick, but I now know at least a halfdozen different transformations that are really just variations on the Swern Oxidation.

[3] As a bit of an explanation, one of my interests is nitrogen.  Whether that entails nitrogen containing natural products or reactions, I’ve decided my work must involve this bit of the periodic table in some way.  So whenever I see an Aldol, Heck and Pinacol reaction I start adding in nitrogen atoms.  The first two cases give me the Stork-Enamine and Hartwig-Buchwald reactions, but that third…hmm.

[4] Knowing what to focus on is a post in and of itself, and one that’s proven stubbornly resistant to writing.

NMR Solvent Residual Peak Concentrations

Tags

, ,

I’m just going to leave this here, for the next time I (or anyone else) want to determine the in-tube concentration of an NMR sample.[1,2]

Solvent [Residual] in mM
Acetic Acid-d4 27.1
Acetone-d6 2.30
Acetonitrile-d3 13.1
Benzene-d6 9.52
Chloroform-d 25.1
Dimethylsulfoxide-d6 2.38
Methanol-d4 12.7
Pyridine-d4 14.8
Tetrahydrofuran-d8 7.78
Toluene-d8 5.94
Water-d2 145


Values are derived from this formula:

1000*(1-X)*d/(MW*Y)

x = the posted deuterium purity (ie. “99.8%” CDCl3)
y= number of hydrogen/deterium atoms per molecule.
d = density of the deutero solvent.
MW for residual solvent (ex. CHD3O for methanol)

Here’s the spreadsheet.


[1] Low concentration samples can be calculated by using the 13C satellite bands, which are 1/200 the concentration of the standard residual peak.

[2] For water, rinse the NMR tube, vial, etc. with D2O prior to dissolving your sample.

10 Things that I would rather do than run a difficult flash column

  1. A convoluted extraction series.
  2. Change the limiting reagent.
  3. Distillation.
  4. Trituration / Sohxlet.
  5. Prolonged high vacuum treatment.
  6. Recrystallization.
  7. The bisulfite/DNPH trick (aldehydes only).
  8. Secondary reactions [1].
  9. HPLC.
  10. The next reaction in the series.

[1] Protections, oxidations, etc.  Ex. Contaminant an amine?  Treat with acetyl chloride and base.  RF shoots up, and the column is no longer difficult.  Transient protections are also useful for 1,3-diketones and other tautomeric structures.

How to Activate Molecular Sieves

Tags

, ,

Molecular SievesSieves are a beautiful invention, as I’ve said before.  At 10-20% w/v, 3A molecular sieves will dry every common solvent except acetone as well or significantly better than a solvent still [1, 2].  A bottle of sieves/solvent is also far less likely to catch on fire and is far cheaper to maintain (no argon or water lines).

Unfortunately, sieves are shipped saturated with water and must be dried before use.  Sieves actually absorb water at 120 degC, so a conventional drying oven is not up to the task.

Conventional wisdom is that heating to 300 degC or greater at atmospheric pressure will dry sieves, and this temperature can be reduced somewhat under vacuum [3].  Experimentally I had some success heating to ~200 degC overnight in a vacuum oven, but was never quite sure that the sieves were fully active [4].

Holding the sieves at 350 degC for 3.5 hours is the right amount of overkill.  While this is a temperature out of reach of most drying ovens, it barely hits “medium” on the temperature setting of a glassblower’s annealing oven.

An annealing oven.  So pretty...

That’ll do.

When drying sieves go for economy of scale.  Large recrystallization dishes will hold up to about 4 kg at a time (190×100 mm), and have the advantage of being ~1.5 cm smaller in diametre than an average size glass desiccator.  Once they’ve been activated let the sieves cool to ~150 degC in the annealing oven, then transfer them over.  Take care to fill the desiccator with drying agent to at least the height of the inner glass studs, as contact between the hot recrystallizing dish and cold ceramic/glass will almost certainly shatter one or both.

Take care to cover the glass baffles (left) with drierite.  The recrystallization dish should fit within the dessicator without touching the sides (right).

Take care to cover the glass baffles (left) with drierite. The recrystallization dish should fit within the dessicator without touching the sides (right).

Active sieves can be stored in any convenient glass container, provided the lid is well sealed.  Double wrapped parafilm works well, sufficient to keep the sieves active for at least six months.


[1] Sieves are mildly basic, which triggers aldol reactions in acetone and can decompose some compounds.  For example, after prolonged storage (8-10 months) of triethylamine over 3A sieves I’ve noticed a yellow discolouration in the solvent, likely due to formation of diethylamine.

[2] Larger sieves are recommended for the drying of some solvents (ie. 5A for pyridine).  The difference in final water concentration is pretty negligible though, and the larger sieves can trap solvents like methanol, reducing their utility.

[3] Flame drying in a roundbottom flask under vacuum was standard approach when I arrived in Alberta, but was good for only small quantities.

[4] How to determine if molecular sieves are active: Place a small quantity on a gloved hand, and add roughly two volume equivalents of water.  If the sieves are fully active they will become too hot to hold, even through the glove.